Showing posts with label Locations. Show all posts

Saturday, February 12, 2022

Adventures in Rekeying

Hey! The blog's not dead, just busy, plus what bandwidth I have for RPGs right now is going towards my in-person games. Still, I find time to plug away at old-school material.

I've been going through the G series and rekeying it for likely future use. And boy do I need to rekey this stuff, because no way am I going to run this at the table in this format.

From G2: The Glacial Rift of the Frost Giant Jarl

5. ICE CAVERN: The giants have frozen 8 corpses of mutilated victims. standing them upright in blocks of transparent ice. Evidently these are meant to "frighten off" any trespassers. The bodies are obviously hacked and very dead, not merely frozen whole. Each of these corpses has some valuable item with it in the ice: 1) is dwarven with a battle axe +1, 2) is elven with a long case at its feet (cold wand with 16 charges), 3) is human and wears a jeweled belt (worth 7,000 g.p.), 4) Is human and has a tube In its hand (a scroll of protection from elementals), 5) is dwarven and has a spilled pouch of (3710 g.p. base value) gems at its feet, 6) is human and wears a fire resistance ring, 7) is half-elven and grasps a sack with a burst seam showing silvery coins (471 s.p.). and 8) is a human In gleaming armor (magic armor of vulnerability,-2 but appears as +2 until actually struck in combat). If a fireball is used to melt the ice blocks, all magic and jewelry will be destroyed. Lesser fires or chipping will cause melting or vibrations which have a 10% per block cumulative chance of causing the ceiling of ice and Icicles to collapse and inflict 6-60 hit points of damage on each creature beneath.


I tried rekeying this in the format I cribbed from Castle Xyntillan, which I also used for the First Rat Bank:


5. Ice Cavern. (4’’x3’’) 8 standing blocks of ice contain mutilated corpses, each with a valuable item within. 

  • If a fireball is used to melt the ice, all magic and jewelry is destroyed. Lesser fires or chipping has a 10% per block cumulative chance of causing the ceiling to collapse for 6d10 damage on each creature beneath.

  • Dwarf with a battleaxe+2.

  • Elf with a cold wand (16 charges) in a long case.

  • Human wears a jeweled belt (7,000 g.p.).

  • Human holds a scroll of protection from elementals in a tube.

  • Dwarf with a spilled pouch of gems (3710 g.p. Base value).

  • Human wears a fire resistance ring.

  • Half-elf grasps a burst sack of silver (471 s.p.).

  • Human in gleaming armor (armor of vulnerability -2, appears as +2 until first struck).


We've cut 40%, from 227 to 135 words, gained a great deal in readability and scannability. More interesting, it's probably shorter depending on how wide your margins are. Here on the Blogger editor, my rewrite is slightly longer, but in the preview they're the same length. Meanwhile on google docs it's actually shorter, and it remains so when put into two-column form. In conclusion: rekeying old modules is worthwhile, will make them easier to run, and doesn't make the modules page-for-page longer. 

Thursday, December 10, 2020

The Smiling Sphinx: A Magic Shop That Isn't a Magic Shop

I've never been much of a fan of the idea of a magic shop. I don't know of any fictional basis for it outside Harry Potter (which I read as a kid, but wasn't my favorite fantasy book), and it always struck me as a bit silly in tone. Plus, I've never run a game with a high-magic setting. Castle Xyntillan features a magic shop and a potion shop, but I ran both as specialty merchants with small stocks of expensive gear, and as a result, visiting them is rarer.

Then I watched this video by Taking20, which shifted my thinking and gave me some ideas. I now think a magic shop could work, in a medium-high magic setting, by switching the context from 'friendly neighborhood store that happens to have a Flametongue in stock' to a shop which maintains the mystique of magical items while allowing players some agency in choosing them for themselves, while offering a money sink.

First off, it doesn't look like a magic shop. It looks like a restaurant.

The Smiling Sphinx

When the Smiling Sphinx first came into the city, the party heard a great deal of hubbub about it. Some foreign haute-cuisine to tantalize the nobility. It only got more attention after it opened, since it never seemed to be open.

It was built out of an abandoned manor house, remodeled at great expense in reds and golds, with stone friezes echoing ancient civilizations flanking the main doors. But there's no grand marquee, or even a visible sign. Just a framed pamphlet set on the door reading:
The Smiling Sphinx 
 Table by reservation only
Nobody you know knows how to get a reservation. Nobody you know even knows anybody else who knows. Of course, there are rumors about the clientele. A few days out of the month, a couple carriages full of elegantly dressed parties pull up at lunchtime. They are seen leaving several hours later, again by carriage, often with luggage boxes they didn't carry inside. 

The Smiling Sphinx is classy. It is elite. It is exclusive. You have to be in the know, high class, rich, famous, politically important, just to get a reservation. At least, that's what all the rumormongers say. None of them have ever been either.

Speculation about the Smiling Sphinx runs rampant, and nobody who works there has any interest in dispelling it. In fact, everyone who works at the Sphinx also seems to live there, coming and going from the old manor house by side entrances. 


The Smiling Sphinx may remain just an odd detail on the rumor tables, something for your party to idly conspire about, until they start making serious money. Once the party's purse has grown heavy with adventuring funds, say levels 5+, they receive a letter from a liveried courier.

You are cordially invited to dine at the Smiling Sphinx, with the full complements of the house, on the following date. Our establishment's dress code requires formal dress, and the surrender of all arms and magical tools prior to entry. A carriage will arrive at your residence at the appointed time.
- Ataxas Bloom

The party is fully expected to be dressed and ready once the carriage arrives. Tardiness or sloppiness is disrespectful, and will likely result in missing out on future invitations.

Assuming the party goes through with all this, they are conveyed in style to the Smiling Sphinx, where they are allowed entry. Inside is a stylish sitting room where the party is served appetizers and a decanter of wine. Everything is chef's choice. The proprietors of the sphinx have the best taste, and the sooner one accepts this the better.

The food is good, but hardly anything to get excited over. The service is polite, but not exceptional. Party members of noble birth will likely be miffed. And there's just 1d3-1 other parties there. 

Once the party is escorted from the sitting room to their private table in a private room, the hostess leaves them the menu. 

'But wait!' party members may say. 'I thought all the food here was chef's choice! And the invitation said all the food was complementary! What's going on here!'

The food is indeed, all complementary. The menu doesn't contain food.

The menu lists various magical items, with corresponding illustrations and prices. The Blue Menu lists minor magic items. The Red Menu lists more powerful items, priced appropriately higher. The Gold Menu lists not just Greater magic items, but magical creatures and their offspring.

During their first visit, the party will just be given the Blue Menu. Just one, to share, so they have to pass it around. They will be subtly informed about the Red and Gold Menus. There will be notes in the Blue Menu that more potent varieties may be found there. The party will not be provided with them. Not yet. They haven't been approved to see them.

Anything you dream of may be purchased from the Smiling Sphinx, if you have the coin. Potions, scrolls, spellbooks, weapons, remarkable items of myth. Anything. 

But before the proprietor of the Smiling Sphinx is willing to offer these to the party, they have to be trusted. They have to prove they're good for the money, that they have the subtlety to maintain the shop's mystique. They will be made to wait. The proprietor keeps a close eye on who's who, who has the money to purchase his items and how many. The party will be exposed to many items they can afford, and many others they can't. 

Once the party have made their orders, the hostess notes them down, and returns with lunch. The party is encouraged to take their time while their order is filled. They can always ask for seconds. Entertainment, such as music, tricks and dancing, can be provided at request.

Within the several hours the party is likely to take with lunch, the hostess and her assistants return from the basement with their orders, presented at the end of the meal. They have already received payment from whichever institution the players keep their money with. Their items are loaded into the carriage that takes the party back home.

And like that, the party now has their Flametongue, or Wand of Cold, or Broom of Flying, or Bag of Holding. More to the point, the party is now viewed by others are people in the know, with access to exclusive levels of society. An invitation to the Smiling Sphinx transforms an adventuring party from a crew of wandering murderhobos into participants in important society, a force to be reckoned with.


What is the Smiling Sphinx Really?

The Sphinx is an enterprise by the archmage Ataxas Bloom. It's not just about making money, but about giving Bloom power by creating a sense of luxury and exclusivity alongside his ability to procure and sell rare and wonderful things. He seeks to cater to the wealthy and powerful, but in such a way that they come to him and not the other way around.

There are, in fact, many Smiling Sphinxes, in many cities. They are all made as similar as possible. It is a veritable institution unto itself, which status-seeking nobles will pay dearly in coin and favors to have in their own domains.

And a good thing too, because the Sphinx is very expensive to run. It's not the food and the carriages, those expenses are drops in the bucket. The problem is the security.

Every member of the staff has to be deeply trusted. They are usually magically learned themselves, apprentices to Bloom or his associates, using service at the Sphinx to pay for their apprenticeships and prove their dedication. The hostess that welcomes the party prepares spells and wears items to detect and deal with any subterfuge or ill intent from guests. The manservant at the door is tasked with putting any uninvited guests to sleep, or using more lethal measures if necessary.

And then there's the main event, the big feature which makes the Sphinx truly secure. Until the items are ordered, they aren't even on site. The basement of the Sphinx is the location of a long-range teleportation circle, built at enormous expense. It connects to a hidden vault at an undisclosed location, where Ataxas Bloom keeps his hoard, along with a zoo of magical beasts. 

All the Smiling Sphinx locations connect to the same central vault, and so pull from the same stock. That also means that if you want to break into the shop and steal their stash, you're going to have a hell of a time. Breaking into the Smiling Sphinx's vault would be a high-level adventure, with potentially massive payoff.

--------------------
Do you already use magic item shops in your games? Are you thinking about it now? Comment below. As always, if you liked what you read here, be sure to follow the blog. Until the next post, have an excellent week. 

Sunday, November 8, 2020

Depravities of the Dinosorcerer: Lessons from Playtesting

Earlier this week, I finally ran not one, but two playtest sessions of the adventure I've been writing, Depravities of the Dinosorcerer. Both took place with two players due to scheduling and connection shenanigans, but I expect the Thursday sessions to continue for the foreseeable future. 

This won't be a full report like I usually do, more of a summary plus what I learned from playtesting. The dungeon is meant for a level 3 party to start. The first group was level 3, the second was level 5 and 6, since they were imported from my CX campaign, but they still provided plenty of useful testing information.

Party 1: Thursday

Kel, Dwarf Fighter
Lishan, Druid
And their entourage of fighters and a lightbearer
  • Kel and Lishan arrived in the jungle village of Dewhill following rumors of raptors, and another adventuring party who had disappeared. They entered the dungeon, and were perplexed by a riddle on a bust which commanded them to 'speak the name of magic.'
  • They explored to the west and south, encountering a large, vicious chicken with teeth feeding on the carcass of a cow. A raptor! They tried to befriend it with rations even as it warned them away, and got ambushed by two more of them. They took serious damage, but managed to kill one, and drove the others away.
  • Following the raptors, they crossed a geyser-filled hallway, and located a secret chamber filled with empty chests and sacks, and a single sapphire ring. They were immediately suspicious, and cast Detect Magic, and noticed that it was in fact a magical item. However, on approach, a microraptor jumped onto the pedestal, snatched it, and ran down a spiral staircase.
  • They found the raptor lair, but they weren't alone. A wild-eyed bandit that the raptors seemed to obey, Maxim, offered his hospitality. He had kidnapped the village priest, stolen cattle and jewelry, and offered an alliance with the party to fence off his stolen goods in town, passing them off as dungeon loot, and splitting the profits.
  • Not confident they could take Maxim and his flock on, the party agreed. He showed them the loot, told them how much he expected it was worth, and escorted the party back to town. He released the priest, Bartleby, into their care, with the promise that the priest would not breathe a word of the truth to the townsfolk.
  • Bartleby told the party that Maxim was a were-raptor, makes the party promise to kill him, and gives them a silver dagger. The party rests for a week, during which they sell the loot and give Maxim his cut. They end up with the minority of it, but enough to hire some henchmen and get started. 
  • They returned to the dungeon, this time exploring to the east, discovering signs of another party's passing through, plus a binding ritual gone wrong, which they left alone. The body of a wizard wearing a full helm was discovered, with a massive bite mark in it and a bloody trail leading away. 
  • In a parlor, they found an iron cage with a pixie inside it. Maxim mentioned this one, and said the pixie had a pouch of fairy gold they could split. Instead, the party let the pixie go, with the promise he will return to them when the time is right to take down Maxim. 
  • A walled garden outside had several large amber blocks containing prehistoric creatures. The party followed the blood trail to a fogged-up greenhouse. They entered and found a number of very odd plants, plus a locked alchemy cabinet. The party was haunted by their own voices speaking out in the fog, and a giant toothy maw appearing from nowhere and almost biting their heads off. They ran like hell, and schemed how to destroy the greenhouse and the spirit within.

Party 2: Friday

Boroth, Human Fighter
Corby, Human Cleric
And their entourage of crossbowmen and a fighter
Taking place in an alternate universe of our Castle Xyntillan game
  • Boroth and Corby traveled to the southern jungles in search of Idred, who had been investigating an old wizard's abode there before disappearing. They left behind their halfling companion due to his hangover, and arrived with their own hirelings. They quickly deciphered the meaning of the riddle, with Corby yelling out Abracadabra! and opening the eastern door.
  • They checked the west, and their hireling said he saw a colorful chicken eating the carcass of a cow. The party decided it must be a cockatrice, and decided to avoid it for the moment. They explored to the east, finding Idred's signature in a guest book, and the failed demonic binding. With the book that contained the binding spell nearby, they fixed the ritual and forced the demon to manifest. They asked it where they might find Idred, and it gave cryptic answers before disappearing. 
  • They found his bloody corpse in the next room. 
  • They immediately followed the blood trail outside to the greenhouse, discovered a number of very odd plants, plus a locked alchemy cabinet. They were creeped out by hearing their own voices speaking out from the fog, and they sent their hirelings outside while they tried to speak with the presence. It attacked from the fog, and they fled. 
  • They put their heads together, and decided that the best approach was to smash the greenhouse to pieces and pull the cabinet outside so they could loot it. This worked quite well, and the fog spirit was forced to follow them outside, where it lost its invisibility. The fight was tough, and it chomped one of their arbalists in half, but it was soon slain, and the party collected valuable potions and reagents.
  • In the parlor, they found the pixie in the cage, and after some questioning, let it out. As part of their deal, it would return to them if they called.
  • They returned to the site of the supposed cockatrice, and found that it was instead three raptors, which they utterly crushed. They navigated the geysers beyond and were received by Maxim, who offered them his hospitality. Seeing that he was a bandit (and, they assumed, a wizard) who had kidnapped the priest, the party elected to kill him. They managed to surprise him and his raptors, and turned the tide of the battle with a Hold Person spell. From there, the raptors were swiftly destroyed, although one got away.
  • They restrained Maxim and released the priest, who informed them that Maxim was a were-raptor. They found a pagan lizard idol on his person, which Boroth removed, but was not taken in by the idol's magic. Corby, being a sixth level cleric, had the option of simply casting Remove Curse, and Maxim was reduced to a pathetic, ordinary bandit, begging not to be returned to town for judgement.
  • That was not the end of the adventure. Boroth and Corby explored the southern area, found a secret door hidden behind a sarcophagus, ran away from poison gas, and found the hidden tomb of the wizard Khorbus, although they elected not to break down the amber tombs without proper mining equipment. Then, they descended to the next floor.
  • In the second floor, they found a looted treasure room, incinerated a pack of undead circus monkeys, played peekaboo with a gargoyle, and met a squadron of lizardman soldiers who took them to meet their religious leader. My session plans effectively fell apart there, so the sessions concluded nicely.

Playtesting notes

The first room, containing a bust, a riddle, two doors and an ankylosaur skeleton, worked pretty well. It set up what needed to be set up. I'm surprised that neither party took a closer look at the skeleton, though.

The second room was less of a hit. It was also empty of traps or monsters, but had some flavor text which was meant to build tension and give a sense of the dungeon's history. A guest book contained names from seventy years ago, plus a recent signature from the last party to pass through. That part worked, but it also contained a bunch of glass spheres hanging from the ceiling with dead fireflies in them. It's an evocative image in a visual medium, but in narration it turns out to be a very fiddly concept. Gonna be changing that one.


The third room, which was a mimic fountain in the original draft, was the changed at the eleventh hour and became a failed demon binding. That was better, but when both parties searched the surroundings, I realized something was missing, so I added a book which gave more information on the nature of the binding. The second party took this in an interesting direction by completing the binding, which I hadn't even considered before. Good direction, going to clarify the room more, and probably going to put the book elsewhere in the dungeon.

The fourth room is, again, empty, but builds tension with the wizard's corpse and foreshadows the monster in the greenhouse. This room doesn't do much heavy lifting, but it also doesn't take up much space or time, so I'm keeping it.

The fifth room, with the pixie, the sunroof and the secret door, works pretty well. I'm going to rework the pixie encounter a bit to emphasize the fairy gold, in order to more effectively tempt parties.

The sixth room, a hidden fossil storage, was discovered by both parties in short order, which I like. The monster encounter here was hobbled by trying to make it into a reference, which none of the playtesters got, so I'm changing that one around.

The walled garden worked decently as a connector between many other rooms. However, there was one big issue. As soon as I described the amber blocks containing preserved prehistoric creatures, both parties immediately observed that, yes, sixty tons of amber ought to be worth a lot of money. As a GM, I cannot help but agree, and would be disappointed if my players did not notice this. However, as a module designer, I cannot help but scream that such a thing would utterly destroy the XP/gold progression of the dungeon. Even if my designer-self were to specifically include a note such that the blocks would be worth much less, or could not be removed or sold, my GM-self would recognize this as petty revisionism and would likely ignore that instruction at the table. Gonna change something here, don't know what.

The greenhouse worked very well. There was a change in tactics as soon as it hit the table, since the fogling was supposed to try to lure a PC or hireling away into the fog before beginning its attack, but in practice there's no way to do that. A few creepy exchanges with stolen voices works just fine, and has a great effect. Smashing up the greenhouse was also a solid tactic.

The cattle pen with the hidden raptors worked as expected, though I need to work on the order of my narration. That's staying.

The geyser-filled corridor is a neat idea, and it served as a solid obstacle, but I'm falling out of love with it. It may stay, it may go.

The velociraptor lair worked pretty well, no complaints. Need to work on my own narration.

The room filled with empty sacks and chests didn't work. I had an image in my head like an Indiana Jones movie, with the party approaching the ring on the pedestal, only for it to be stolen by a magpie dino. It just doesn't work in play. Also, why is there a whole room of looted stuff, except for one valuable item, in the open, not hidden, directly across from a bandit's hideout? Seriously past me, what the hell?

The room with the demon sarcophagus worked well, though I need to rework the trap to look more urgent. 

The fourteenth room wasn't entered by either party, and I think I might rework it along with room 12 into something more coherent with the rest of the dungeon.

At multiple times in the sessions, I said out loud, this is why we playtest. I've already reworked a goo amount, and this floor is the smallest section of the dungeon. I can scarcely imagine how much playtesting must go into big products like WOTC adventures. I'm suddenly a lot more understanding about logic errors in adventures.

Monday, November 2, 2020

OSR: How Big Should Your Open World Be, and How Empty Your Dungeons?

I got introduced to RPGs through the Elder Scrolls series before moving to tabletop roleplaying. While I loved the latter-engine games, from Skyrim's icy tundras to Morrowind's blighted wastes, no game in the series is as big as Daggerfall. The exact size is up for debate, but the procedurally generated wilderness is comparable to the area of Great Britain. Some 4,000 dungeons, thousands more towns, temples and farmhouses, and you can visit them all through seamless horse travel! Do you know what this means?

It means that the game is effectively a pointcrawl.

Oh boy, I wonder what's behind those trees?
I know! MORE TREES!

While it's technically possible to travel all over the Iliac Bay on your horse (or, Divines forbid, on foot!) you'd certainly be bored to tears before getting anywhere. Realistic distances combined with 'realistic' travel speed means endless hours pressing the 'W' key.

That is why the intended way to play the game is to fast travel. Open your map, click on a destination, pay travel expenses and watch the days count down over a few seconds before you load in. Oh, and if you're sick then you die on the way. Sucks to be you. 

All that wilderness gets no interaction. Maybe you decide to try riding from one town to another for novelty one time, or you run away from the guards into the forest after you massacre the townsfolk and manage to get away, but then you just open your map and fast-travel to your next destination. In theory, you've got a truly massive open world dotted with adventure just waiting to be found. In practice, you've got a whole lot of distance between anything interesting which always gets skipped over. The wilderness could be a small area around each location plus a prompt to fast travel elsewhere, and you'd lose very little. It's just too big.

So if you're building an open world, how big should it really be?

I'm thinking of hexcrawls like Rick Stump's Seaward campaign, which contain a jaw-droppingly large number of hexes, many just terrain, but with hundreds of labeled locations built up over decades of play. That gives me some of the same feeling as Daggerfall's map, with the distinction that travel in such a hexcrawl has some meaningful choices without taking up much table time. 

These worlds are characterized both by the amount of content in them, and the empty space between that content. For tabletop games, the 'size' of a world amounts to those two factors. How much is there to do, and what resource costs are imposed for getting from one to another? Supplies, in-game time and table-time all count as resource costs, especially if the party is going hex-by-hex. If there are no costs associated with travel, then any sense of distance is a transparent fiction. All your encounters might as well be themed areas in an amusement park.

When the party travels hex-by-hex, choosing the next direction to travel in, rolling for random encounters and getting lost, you can really sell the sense of scale, and the sense of real exploration as well. Check out the Briar Woods session reports in the link above, which get across the grueling nature of exploration in a hostile environment, and how rewarding it can be to discover a secret or to map a whole region. But it also sells how much table-time is sacrificed to build that tension.

Oh Dear

Pointcrawls lose some of that, especially if you can only reliably travel to places you already know, but they really expedite the process at the table. Want to find the adventure? Here are the locations, pick one, pay the resource costs and roll for wanderers. Quicker, simpler, easier gratification. You don't get to feel much like rugged explorers mastering the world around you, but you get to the interesting content faster.

I recognize that some GMs, Stump included, would protest that the unpredictable events and the intense process of exploration that their games create are as much a part of the interesting content any prepped dungeon adventure or town intrigue. Most days, I even agree, and lean towards that sort of play myself. But if I had started the first session of my Castle Xyntillan campaign by making the players travel hex-by-hex and find the right fucking mountain pass in order to get to the massive dungeon filled with exotic treasures, ancient mysteries and extravagant NPCs, there probably wouldn't have been a second session.

Of course, this talk of open worlds and hex-vs-pointcrawls does miss the point that the same dynamic is present in the smaller scale. D&D and its descendants are fractal like that. Some of the same concern over space between content is present in how many empty rooms are in your dungeon.

'Empty' is, of course, a relative term. I'd like to think most GMs today know an empty room doesn't have to be literally bare. It can (and should) have some flavor text, some hints, some humor, even some treasure every now and then. It can still interact with the rest of the dungeon. Just like how an empty terrain hex can still have flavor text and provide a challenge, by getting the players lost, being a site for weather changes and wandering encounters, and providing context for the non-empty hexes nearby.

Given that virtually all my experience with tabletop RPGs has been in the OSR, I've had it quite firmly implanted in my mind that some number of empty rooms is good for a dungeon. I tend to go by Moldvay's 1/3 standard myself, though I know some people have way more. As a result, I do sometimes forget this isn't the default assumption. I recall the first (and so far only) 5e game I played, where a friend of mine was trying his hand GMing for the first time. In the process of making his very own dungeon, he didn't try to create a realistic space (or even a fully representational map) as much as a diagram showing the flow from one encounter location to another. The flow happened to be a straight line in this case, but the principle applies.

Encounter 1, Gate. Encounter 2, Spike Hallway. Encounter 3, Chocolate River, and so on, until the eleventh and final encounter, a big boss fight. 

There was variety, a mix of puzzles with combat encounters, and one point with two paths to choose from. But it was transparently a path from one setpiece encounter to another. No wanderers, no resources consumed from travel, no time records kept (as the specter of Gygax howls from the infinite space between worlds), and minimal interaction between encounter areas. To someone accustomed to the OSR way of things, this feels odd. But it fulfills the same goals as choosing a pointcrawl over a hexcrawl often does. It cuts empty space between the interesting stuff. Exploration is encounter-by-encounter, not room-by-room. If the GM has put some work into giving the space some verisimilitude, then empty spaces are glossed over in narration. If not, disbelief is suspended and you get right into the next encounter.

On the micro level, I have very strong preferences for empty rooms over the alternative, but on the macro-scale, I don't have nearly as strong a preference, and may even lean to the other side. I can't think of a principled reason for this, rather a parochial sense that dungeon design with empty rooms is The True and Right Way, while hexcrawls seem a bit outdated and harder to do for a novice GM. After all, filling out terrain hexes with the odd flavor text doesn't take any more effort than doing the same for a dungeon room.

It may be a matter of ratio between 'empty' and 'full.' Every couple months when I get swept up in the notion of making a big world to hexcrawl in, I run into a big conceptual wall which tells me I'm going to fill ten empty hexes for each one with real play content, whereas a dungeon will have more rooms with meaningful choices in them than not. 

Sarkomand's Fault, first played draft. Still too big.


Looking at DMiurgy's post on his Sarkomand's Fault hexcrawl, it looks like I wasn't the only one with that impression. He actually dug down and made a hexcrawl that big, and downsized later when it was plainly too much. My takeaways from that post are: 

1. You don't need that many encounters.

2. You don't need that much space between them either.

Even the heavily edited version of that map had more unkeyed than keyed hexes, although those unkeyed hexes were often the site of improvised encounters. I haven't exactly done an exhaustive search of the genre, but I haven't found a hexcrawl with more than half the hexes keyed. In contrast, I don't know of many dungeons where more than a third of the rooms are unkeyed or 'empty'.

Is there a particular reason for this difference of the micro and macro scale, when the cost of stocking rooms and hexes seems similar? I don't know. I leave that to your comments below.

------

If you liked what you read, please be sure to subscribe to the blog. Until next time, have an excellent week!

Tuesday, July 14, 2020

The Charnel Ground

There was a famine in the vicinity. People were continually dying. Sometimes half-dead bodies were brought to the charnel ground, because people were so exhausted with the constant play of death and sickness. There were flies, worms, maggots and snakes. Padmasambhava, this young prince you had recently been turned out of a jewel-laden palace, made a home out of this; seeing no difference at all between this charnel ground and a palace, he took delight in it.

- Crazy Wisdom, Chogyam Trungpa

The 8 Great Charnel Grounds Are In Your Mind | Blau Stern Schwarz ...

At the bend of the river lies the charnel ground. A delightful feast for the carrion-eaters, vultures and jackals, tigers and bears. The bodies of the dead and dying are left here during the day, splayed out naked under the burning sun. 

No sane, good person attends to these places. The beasts make little distinction between a dead offering and a living visitor. Ghosts and zombies rise here. Demons frequent these places and steal the freshest bodies for their pleasures. Who would come here on their own two legs?

The charnel ground is an isolated meeting place for the dregs of society; for spies, traitors, bandits, witches and sorcerers. It is dangerous and chaotic, but if you fear being followed, passing through a charnel ground will lose a less resolute pursuer. 

If you seek out necromancers and cannibals and their ilk, who are hidden elsewhere, you will find them in the open here, dancing among the bodies. 

Hooks

1. A scandalous rumor engulfs the city; a shepherd saw the young prince returning from the charnel ground, coated in blood! The prince has not been seen in days, and the shepherd is locked at home.
2. Newly arrived and lacking any social status, the party is assigned a task for the lowest of the low; pulling a wagon of fresh bodies to the charnel ground; not all of them are dead yet.
3. The party is close to uncovering a long-sought secret, or may finally meet their anonymous benefactor; but the meeting may only occur at midnight, at the ruined temple in the charnel ground.

The benefactor is:
1. A cannibal
2. A witch
3. A cannibal witch
4. A sorcerer
5. A demon
6. A sentient giant scorpion


Mindfulness of Death Series : Part 3 : Contemplations Regarding ...


The Charnel World

In Tantra Buddhism, the charnel ground is a metaphor for the world itself. Underneath any illusory glamour or self-deception, the universe is an infinite charnel ground, extending in all directions. You are surrounded at all times by death, by sickness, by the woes and tribulations on the dying whose entrails are slurped out of their bellies by carrion-eaters. There is no hope. There is no salvation.

This would, at first, appear a nihilistic proposal. Or, perhaps, you think, this is another test. One must only give up all hope, embrace hopelessness, and then salvation will paradoxically arrive!

It will not. It is exactly what it says on the tin.

What can one do in a world with no hope of escape? No breaking of the cycle? 

The obvious answer is to cower in a corner and wait for death.

But another, much better answer, is to adventure. To understand your position in a charnel world, and yet make the best of it. Drink from rivers of poison and revel in the taste, explore and document the horrors which unfold in all directions. Seek out the most wondrous and dangerous of all things in the world, and slay them, or learn from them, or bang them. 

Just do something interesting, for crying out loud.

Friday, June 5, 2020

How Jaquaysed is Gatehouse on Cormac's Crag?

I wasn't planning to write another of these for a while. The dungeon and main floor of Castle Xyntillan are big endeavors to tackle, and I need to give those the time they deserve. Luckily, Gabor turned me on to another module, Gatehouse on Cormac's Crag by David Bezio. It takes a simple, pared-down approach to creating an 130-odd room, 7 level megadungeon. It's the platonic early D&D adventure we all thought existed from looking at the Skull Dungeon map. For $3, it more than delivers on its premise.


You can read Gabor's review here. I'm planning to run the dungeon soon for my little cousin and his parents, as an introduction to RPGs. I'll be examining the dungeon's first six levels (the seventh is less traditional) using Melan diagrams. 

Level 1-1.5


The first level of the dungeon is the gatehouse proper, and half-level above it on the roof, occupied by an organized, but largely incompetent, crew of kobolds. The first level offers some choice in early exploration, but descending further into the dungeon requires going interacting with an encounter, a shot at some good early treasure, and puts you next to an objective, one of the missing girls. There's two entrances, but these 

There's little in the way of secret areas here, just a bit of extra treasure if the party can bypass the kobold chieftain and his concubines. Still, this is a solid, short intro level for the dungeon that introduces basic concepts in dungeon crawling.

Level 2


The second level underneath the gatehouse is where the dungeon opens up. From the adjacent rooms of the gatehouse, the party now enters a traditional room-and-corridor dungeon layout, with lots of loops and crossroads. 

This level also boasts a substantial set of secret rooms, with many possible entrances, where the 'boss' as well as the greatest treasure and another of the missing girls are held. Further, it gives the players a peek at the teleporters from Level 3, and gives them a chance to access the next level by accident. Woe be unto the player who teleports to the next level, and can't teleport back!

Level 3


Here on the third level, the scope of the dungeon expands even further. Below this level, the dungeon splits; Levels 4 and 5 are accessible only by a hidden passageway on this floor, while the way to Level 6 is behind some boulders. These obstacles might be the end to a party's delve, although the quest to recover the third missing girl will likely keep them pushing onward. 

This floor also introduces warring factions, with the Tiger Beetle and Gecko goblin clans, and themed sub-areas of the dungeon with the fungi forest. The increased freedom of choice in spatial exploration is matched by the ability of the players to take sides, join factions and pursue multiple goals on the level.

With a staircase from the above floor, a guarded entrance from the surface via the troll's lair, and access via the second floor teleporter, there's a great deal of approaches one can take to explore this level. It's not only the largest, but probably the most jaquaysed of all the levels. 

Level 4-5


Levels 4-5 are thematically connected, the tomb of an ancient sorceress and the last chapel of her chaotic goddess. There's only one way down to this level 4, and only one way from there to level 5, and the place is littered with nasty traps. The way down to the chapel in particular is a tough obstacle, but becomes easy to pass through if you've thoroughly explored the areas above and dealt with a tough encounter. 

There's no real looping here, totally unlike levels 2 and 3, just short side paths with occasional secret closets or rooms. Level 5 is built around a hub chamber, but only with very shallow spokes. This is to be expected, as the whole level might collapse later on, so putting too much treasure or interaction here would be somewhat pointless.

Level 6


Level 6 returns to the heavily looped pattern of 2 and 3. This time, there aren't factions, but there are several objectives to find and recover, three stat-boosting magic gems, plus the final missing girl. After exploring this level, one might expect the party to turn back, thinking the exploration done. There's just the one access to the seventh level (which I won't map, although I'll say it's more linear and cinematic feeling) and besides curiosity or the desire to find out what happened to Lego, there's not an obvious reason to go there. 

Unlike the previous levels with their carved tunnels and rooms, the sixth level is a cave system, featuring windy passageways and great, rounded chambers and vertical trickery that makes mapping (including drawing diagrams) a mess. After crawling through stone corridors, this is a reminder that not all dungeons are artificial structures.

Takeaways

You can predict substantially different experiences for different levels of looping. Levels 1, 4 and 5, which have little-to-no looping, lend themselves to a style of exploration in which the party goes down a path and either finds it to be a dead end in short order, or else finds themselves on the central path to the next level. This is most emphasized in Levels 4 and 5, which have numerous side paths, but they're quite short, usually only 2 rooms deep with no further branching. These also lend themselves to a more cohesive and curated experience as one delves into them. 

Meanwhile, in the more jaquaysed levels, the approach by the party will most likely be to go down a path, and keep going down it until they decide to retrace their steps, and explore the alternative paths next time. With the looping nature of these levels, one can barely predict what the sequence of play will look like. This is, of course, a less curated experience, but when paired with high interactivity really gives the players a chance to make the level their own.

Another pattern I noticed is that the toughest fights, especially in levels 4 and 5, aren't paired with great treasure. Treasure is more often guarded by weaker encounters or traps. The big, tough enemies the party might stumble across are generally on their lonesome, and can often be avoided without penalty. 

Tuesday, May 26, 2020

How Jaquaysed is Castle Xyntillan: Part 1, The Upper Floors

Since I last looked at TotSK's mapping (two weeks ago?! Time flies) I've gotten some extra practice at mapping and finally got cracking on Castle Xyntillan. Since Melan himself said that he hasn't made such a diagram for the dungeon, this should be taken with a bucket of salt, and the knowledge that this is not an analysis by an experienced game designer (of the sort Melan just did for Winter Tombs) but an exercise by a novice designer to dissect a complex piece and try to figure out how it works.

To start off, I'm looking at the six above-ground sections of the castle, since these are smaller and each is mostly self contained, unlike the sprawling dungeon and main floor levels which I dread trying to map.

I use the same tracing, sketching and finalizing process I used in my post about TotSK, but for brevity (and in order to not show any of the maps directly) I'll only be showing the final diagrams, with some annotation when I want to point out specific features.

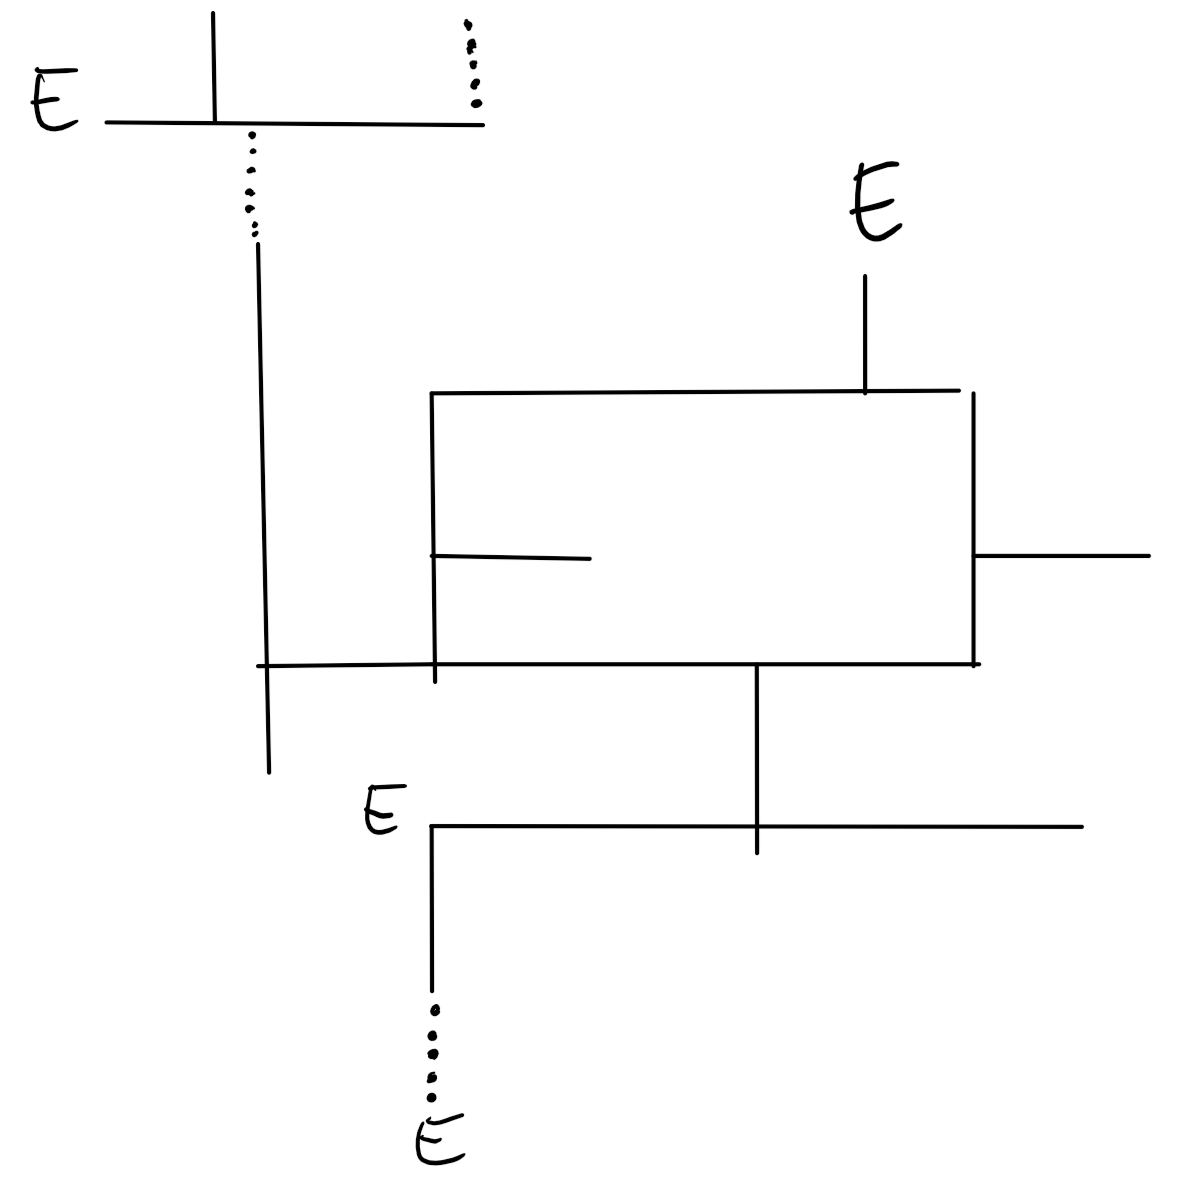
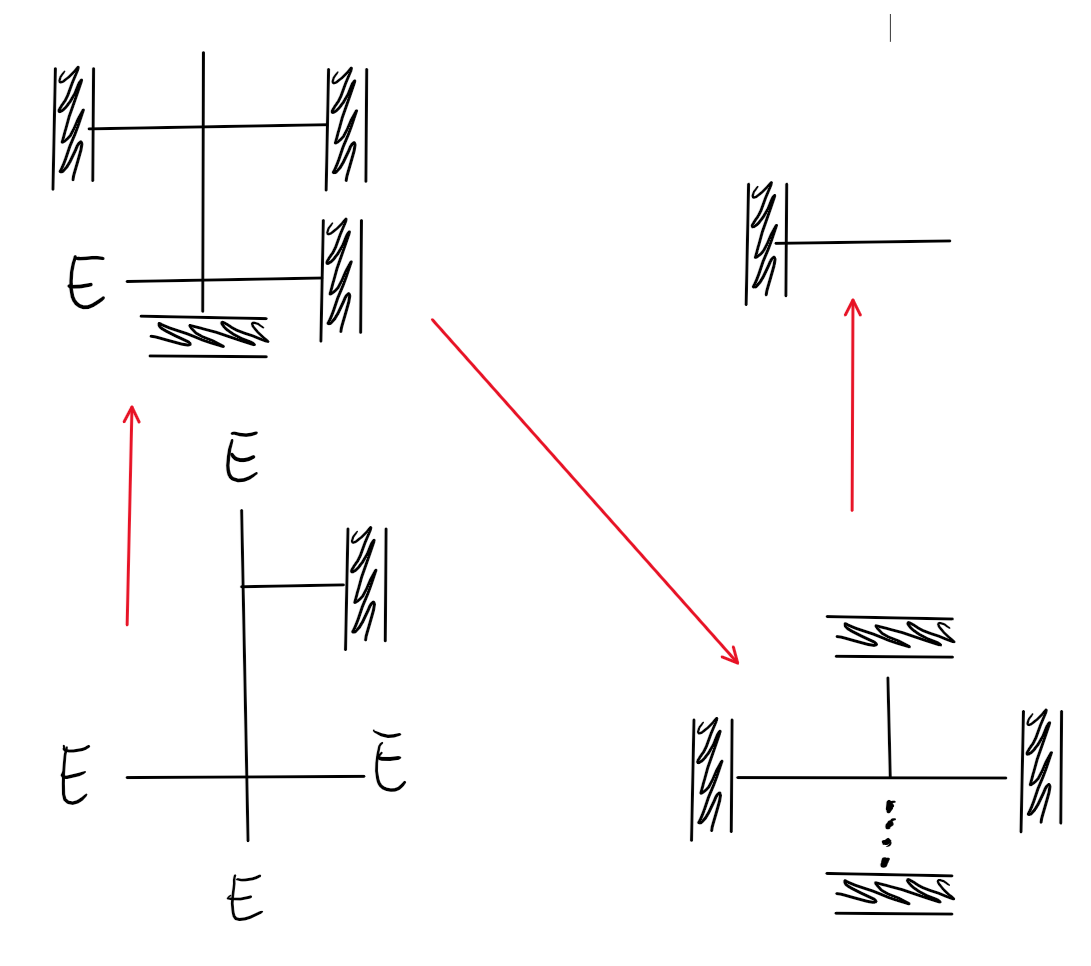
Es represent entrances from another level, which might be horizontal or vertical, while parallel lines with squiggles represent stairways within a single section. Dotted lines represent secret or blocked doors and passages.


The Upper Floors


Section C, 'The Gothic Wing I' is located near the entrance to the castle, and is likely the first of the upper levels the party will visit. Its level of difficulty is close to that of the lower floor that it connects to, but it contains a good deal of treasure. It boasts a fair number of entrances, though variously hidden in amusing places or guarded by an encounter too deadly for a 1st level party to deal with in a head-on fight.

It's also quite well looped; there are four overlapping loops in the main body of the floor. The placement of the encounters in the upper part of the diagram makes it very likely the party will run into a couple of treasure heavy rooms. While it's not combat heavy, the floor also introduces some tougher enemies the party will be seeing more elsewhere, but makes fighting them optional or isolates them from the body of the floor, in a location that makes it relatively easy to escape to another floor or to the outside of the dungeon.

And don't forget that this section hides an entire hidden subsection. It's just a few rooms, but it prepares the party for later areas. The presence of this hidden region can be discovered quickly if the party is mapping carefully, as mine is, and its presence becomes very obvious once the party reaches section D. Though my party has determined its rough location, they have yet to find a way in.


Section D, 'The Gothic Wing II' can only be accessed by the first floor of the Wing, and doubles down on the previous floor's lessons. Like the previous floor, it's not very combat focused, with the greatest challenges coming from tricks, traps and interactivity. If the party has been mapping carefully, some secrets in this wing will become quite obvious.

This wing is likely to be the first exposure the party has to a demiplane which runs through the castle. Also, it provides the conclusion to The Toilet Gag. I provide no explanation for either feature, and hope the burning desire to know the answer will encourage you to purchase the adventure yourself.


Section F, 'The Upper Quarters' is built similarly to the Gothic Wing, de-emphasizing straight out combat encounters in favor of traps and interactive dangers. It even boasts a hidden area, which for those on a certain geas-quest will be quite important.

In terms of mapping, it's positively riddled with entrances, many hidden, but is considerably less loopy than the Gothic Wings, and the likely combat encounters aren't immediately accessible from the section's hub. A careless mapper might place multiple loops due to the presence of many small, interconnected rooms adjoining a larger one, but I cleaned those out of the model.


Out of the entire castle, section G, 'The Donjon' is the most linear. However, it's characterized by a large number of entrances between a very small number of actual rooms, may of them unusual. It does hide one nasty, but potentially very profitable secret, and leaves the method of obtaining it implicit, for players and GM alike to discover by exploring the map. Also, the vertical progression has an absurd cap when the party discovers the way to the top.


Section I, 'The Lake Tower' isn't quite as sparse as G, but neither is it as varied in its entrances and exits. There's just the one entrance, and the upper levels provide an almost predetermined path, unless you find one of a few secret doors, which mostly allow you to skip a room and find an extra hidden area, like in C.

This is an example of a tight loop composed of only a few rooms, which would show up as a larger, multi-part loop if you stuck to the regular mapping method without cleaning it up. This is one of the limitations of the diagram, that the scope insensitivity indicates the existence of loops where they are actually trivial.


Section L, 'The Maze of the Occult' is arguably the most dangerous of all the castle's sections. This is, however, quite adequately signposted. Most of the entrances, obvious, secret and vertical, link to very dangerous rooms on the lower floors. It's very unlikely, though still possible, to reach section L without too much difficulty if one follows a very particular path and gets a bit lucky, but this would result in a very nasty difficulty spike for said party.

Here in the L section we see a good deal of looping and complexity. However, not all of the section is obviously accessible from multiple angles. The lower part of the diagram is only obviously accessible through the chokepoint at L6, which just so happens to be a very nasty trap. There are ways to bypass it via secret blocked off doors, but one is extremely dangerous and the other is so well hidden I doubt any party would find it from the useful end. It so happens that the rooms hidden behind this chokepoint are some of the deadliest in the entire castle, in addition to containing a portal to a certain demiplane.

Some more neat features: on the upper left, three rooms must be discovered sequentially, and likely experienced in the same way. These rooms happen to be very theatrical and showy, with a great deal of interactivity. Though it is technically possible to enter this section via the entrance in the top left corner, it's blocked by some nasty traps, and in practice the party is extremely likely to find the secret entrance to the right before it becomes passable, providing an additional environmental gate and puzzle.

Takeaways

Are there any particular patterns we can glean from this? At a moment's glace, I see frequent use of gatekeeping mechanisms, hiding clusters of tough encounters (and the appropriate treasure) behind deadly rooms that test if the party is ready to enter the area or not.

In the earlier, easier areas, straight combat and highly lethal traps are de-emphasized in favor of interactivity, and where tough combats do exits they are usually placed at the end of short chains of rooms, and not far from an exit.

Where heavy NPC or environmental interaction is present, room progression is often much more linear, though I can't say for sure this is a pattern rather than my spurious assumption.

A few shapes keep cropping up. Boxes with sticks inside of them, overlapping boxes or boxes entirely contained in other boxes. I can only assume that there features would be even more prevalent in the dungeon and main floor sections.

The diagrams also show that areas like the Lake Tower, despite being composed of several adjacent rooms, don't loop horizontally very much, but are heavily jaquaysed vertically, which this sort of diagram doesn't show very well. If nothing else, I'm now more familiar with the strengths and weaknesses of this method.

Until next time, be sure to subscribe to the blog to see every post when it comes up, and let me know what you think in the comments below!

Tuesday, May 12, 2020

How Jaquaysed is Tomb of the Serpent Kings?

Now that I'm running Gabor 'Melan' Lux's Castle Xyntillan module, I've been giving more thought to level design, especially the process of creating complex loops The Alexandrian calls 'Jacquaying'. Melan created the diagrams we use to examine these kinds of design, and Castle Xyntillan is deliberately built around that philosophy.

Unfortunately, trying to make a Melan diagram out of CX is very challenging on account of all those loops, and jumping right into mapping the main level is inadvisable. So I got some practice with the diagrams on a much simpler, but well-known and easily available module, which I've also run before: Skerples' Tomb of the Serpent Kings.

The end result looked like this:

Tomb of the Serpent Kings: Is it Jaquaysed enough?

I don't know what software The Alexandrian uses to make these all look nice, but this is what I could mock up.

My process is to first draw a line through the area I'm mapping. A line which I can draw without needing to lift my stylus or backtrack can be straightened out into a single, straight line. When rooms or corridors split, we end that line and make another perpendicular line.


The original map contains several staircases, but since the dungeon doesn't bend under itself and it can all be seen clearly from above, we can remove most of the stairs from the diagram without needing to worry.

Straightening out the lines, the flow of the map starts to look more familiar


Now that we have a sketch, we can straighten the lines and make it all look nice (as best as OneNote can), and we end up with our final diagram.

I'd say it's pretty well Jaquaysed

We can now see that there's two major segments of the dungeon: the false and upper tombs, which are largely linear, and the lower tomb, which is where the dungeon gets Jaquaysed; there are three major, obvious loops, plus a mini-loop in the warrens and three loops closed by secret passages. The loop in the warrens is a part of a larger loop, same with the overlapping loops in the priestly/tomb area. There's a secondary exit to the surface that the goblins use, but there's not much chance of a thorough party missing much.

TotSK buries its complexity deep (no pun intended), likely part of its choice to be a teaching dungeon. For new players, a relatively linear opening that gradually adds more branching paths before dropping them into the maze would be more approachable, and experienced players accustomed to more linear dungeons will feel at home before they get introduced to greater complexity.

In my completely unauthoritative opinion, TotSK is nicely Jaquaysed for its size and stated purpose.

It's worth noting what Melan diagrams are good for. The'y're not maps. If you handed a party a Melan diagram of the dungeon they were in, it would probably confuse them more than anything. The diagram deliberately cuts out information like the number, size, shape, orientation and content of rooms, all the features that players interact with in moment-to-moment play, to highlight the major choices in space which sculpt the general experience of the dungeon, but which are invisible at any given moment.

These diagrams can tell you how players are likely to move around the dungeon at a glance, where the chokepoints are, where parties are likely to get lost, or feel overwhelmed by choices. For example, though it's far from the most complex part of the dungeon, the pool room in the upper tomb always gives players pause, because they come into a new room and suddenly see eight objects to interact with. In contrast, the much more complex lower dungeon is easier to approach because there's only a couple new paths at a time, though they're built to compound on each other and create loops.

Meanwhile, this is as far as I've gotten on mapping just one wing of CX.

Aaaaaaaaaaaaaahhh!

Sunday, March 1, 2020

OSR: Prison of the Hated Pretender Redux

I finally got down to reading Gus. L's Prison of the Hated Pretender, which I had heard talked up as an introductory/funnel adventure for quite a while now. It really is as good as everyone says, and it's a free PDF.

That said, it's also quite wordy, taking ten pages to describe ten rooms, three tables, and two enemies. Those extra words aren't going to waste with the extra detail they provide, but I need something a little more legible to use at the table. So I've summarized this for my own use. A version of this summary as a document can be found here. I recommend using this in conjunction with the original PDF. Read through it, then use the summary for moment to moment play, and refer back to the original if you need specific detail. The tables aren't replicated here.

I've adapted this for GLOG, which means a couple changes to the statblock and reducing the value of treasure almost 10 times. The original values are listed at the bottom.

Image result for skull cave
Adrian Villarespe

Total treasure (131.3gp) plus unvalued equipment
20gp in jade shards, 12gp, 11sp, 42cp in coins (total 13.52gp), opal worth 5gp, fittings and screws worth 20gp, silver holy symbol worth 3gp, 28cp in coins, 45sp in enchanted glass, 5gp melted copper, 25gp gold-etched mace, 25gp blood rubies.

Armillary of Fatidic Stars, silver scale mail+1, shell-shaped buckler, barbed mace, 2 silver daggers, 6 flasks of oil, 1 flask of strong poison, 30' of silk rope, blackened leather armor

Statblocks

The Hated Pretender
HD 3 (15 HP) DEF 13 ATK 13(1d6 claw/claw) MOV 1x MOR 10 SAV 8
Undead, turns as 4HD
Immunities: normal weapons
Treasure: None.
Cursed: Rise from dead the next night unless its body is destroyed.

Phantasm of Vengeance
HD 1 (5 HP) DEF 16 ATK 11(1d3 touch) MOV 1x MOR 12/8 SAV 6
Undead, turns as 2HD, only by neutral or chaotic clerics


Area 1 - Gate

Mouth blocked by steel bars, door propped open with rock, lock broken.
Outside: gnarled tree, climbing to 'eyes' Area 5. Rope on branch. Dex roll to get from ground to crown.

Area 2 - Entry Chamber

Chamber, crude stone, carved from outcropping. Remains of fires on stone floor. 10' roof.
The Ward Circle: 10' diameter, magical sigils, jade plates, may be shattered (20gp). Inside circle: hear keening and objects slowly pushed out.

Area 3 - Museum of Horrors

Triple archway, relief carvings in rooms, scratched and vandalized. Right: Overlord uses device, conquers. Center: Overlord delights in torment and torture. Left: Defeat by divine intercession and slow execution.
Skeletons of small animals on the floor. Spiral staircase in left room leading to Area 4 and Area 10.
Bright sunlight in day, (1d4+party) phantasms, fixate on creatures in Area 2. 20% chance of d4 phantasms at other times. Reroll whenever passing through this area.
HP avoids these rooms at night.

Area 4 - Landing

Bare, desolate, better condition than below. Sunlight through door to Area 5, counter-weighted open.
10% chance of 1d2 phantasms passing through at any time. 10% chance of HP at night.

Area 5 - Solarium

Light pours through eyes from 11-4. 60% chance of (1d4 + half party) phantasms then. HP enjoys it in evening, here 20% of the time.
Small bones, tossed pots and urns, loose dirt, blood dragging stain. Light through trapdoor in ceiling too, hair rope, leads to roof Area 7.

Area 6 - Pretender's Abode

Windowless room, strong smell of death. Jumble of trash and broken furniture, dresser, end tables, couch, chair, terrible condition. HP rests in nest of rags. Treasure in dresser or on table when in the room: a pile of incongruous coins, 12gp, 11sp, 42cp plus a cracked opal worth 5gp.
Pitch black, HP  is here in day, may be gnawing on bone, playing with treasure. Will panic if light enters the room, won't attack if stopped in 2 rounds.

Area 7 - Grotto

Sunlit in day, roofed. Fresco with bearded scowling faces, eyes scratched out and vandalized. 1d4 phantasms in day, aid and aided by phantasms in Area 8 in 1 round. Avoided by HP.

Area 8 - Pumpkin Patch

Half-roofed, quite pleasant. Chipped stone tub in room, surrounded by dried blood glyphs, pumpkin plant growing inside. Broken furniture in corner, 20gp fittings and screws. HP here 90% at night. If encountered here, -2 reaction. If destroyed, but pumpkin unharmed, will parley next time automatically, be better inclined.
1d4+4 phantasms patrol between here and Area 9 in day.

Area 9 - Battlements

Oval patio, open air. Pair of stone benches. Armillary of Fatidic Stars, 6' sphere of gears and discs, spheres welded in familiar patterns, markings in magic language. Powerful magic item, see table. Works for prophecy just once, but can still banish the phantasms.

Area 10 - Crypt 

Brightly lit, polished stone. 5' radius circle in center, covered in mosaic. Jumble of bones at stairs. Along south wall, 2 bodies, adventurers. 450 pieces of enchanted glass in ceiling(1cp, 45sp). Hp has never been down here, no idea about it. In day, 20% chance of 1d4 phantasms passing through. At night, 2d10+10 phantasms on every surface.
If Armillary is set to the pattern here, will banish the phantasms.
Circle in center is raised, in common: "These Sainted Dead Shall be Free to Roam the Night's Heavens". Will break under more than 100lbs, drop to pit for 1d6 damage. Bones at the bottom, disturbing them summons 1d6 phantasms.
4 sarcophagi, roughly human, not detailed. Inside are skeletons with useless copper plate, can be melted down for total 5gp metal content. The west one also holds gold-etched mace, 25gp.
In north, more ornate sarcophagus behind iron bars. Broken with strength with -10 penalty, using leverage and ropes effectively guarantees it. Opening sarcophagus triggers blade trap, +6 to hit, 1d8.
Inside is bird-head skeleton, bronze plate, bone scroll with 10 blood rubies.


Changes Made

I changed the value of the treasure here to fit GLOG. I was assured by other people who had run PotHP that it's not meant to level a new party, and the value of the treasure here isn't very much. The original values for treasure in Labyrinth Lord are as follows:
Total treasure, 1109.28gp plus unvalued equipment
200gp in jade shards, 12gp, 8ep, 112sp, 428cp in coins (total 31.48gp), opal worth 50gp, fittings and screws worth 200gp, silver holy symbol worth 30gp, 28sp in coins, 45gp in enchanted glass, 50gp melted copper, 250gp gold-etched mace, 250gp blood rubies.

I didn't know quite how to change the save values for the HP and phantasms over, so I just eyeballed it.